Quantcast
Channel: Fly Nerf: The Blog'O Nerf
Viewing all 96 articles
Browse latest View live

AT3K Overhaul

$
0
0
Today I will be showing you my AT3K overhaul. It took me a while to do this because I needed all of the parts and some things broke but here it is!


First I will start off with the list of the mods:
- Glued firing pin spring
- 12" PETG barrel replacement
- Plugged pump
- Tubing replacement
- Rear loading slot
- Air tank to turret seal increase

I am very happy with how this turned out. I have not tested the ranges yet but I am assuming they are pretty good. The problem is that the PETG has a bad fit on my slug darts. It doesn't matter that much because I have a lot of sock darts. I was originally planning to do a hornet pump replacement but the the pump broke so that was out of the picture. Because of that, I just decided to keep the stock pump because it doesn't make too big of a difference I also kept the goo gauge in there because I think it looks cool.


The rear loading slot isn't the cleanest but it is still pretty nice. Overall, this is a very nice blaster. It might get a pump replacement some day but that isn't my priority because I have a better air blaster that I am building.

Stampede Thing (It needs a name)

$
0
0
Hi guys, today I have my favorite mod that I have ever done. It is Buzz Bee Big Blast and Hornet tanks in a Stampede shell. I will give all of the details after the jump.
There is a lot in this thing so I will try to put this in a format that you will read.
List of features/mods:
- Buzz Bee big blast
- Hornet tank with blast button
- Built in hopper
- Bike pump
- Big Blast firing pin linked to stampede trigger

I hope that covered most of the things done to this. The idea for this came to me when I had a broken Stampede and a Big blast tank laying around. I decided that I wanted to incorporate the two together so I set out to make it happen. Along the way, I decided to put a hornet tank in there just for kicks. Everything eventually came together and this is what happened. I put a ton of time into this and I am very proud of it. It will be getting a cool paint job from Aukman once the weather warms up. 
That picture shows off where the Blast Button is integrated. It also shows how much of the shell I had to trim down to get everything to fit in it. 
There is one more angle of it just to show you. It is getting ranges of about 90' with the bbbb and 40-50'   with the hornet. I only pump it four times to get those ranges. I can get it up to five pumps but the blast button starts leaking air. I need to fix the tubing to it and it will be perfect. I know that the barrel looks crooked in these pictures. That is just because the homemade wye got shifted and I need to adjust it. One last thing is that I actually nested loose fitting petg in the pvc that goes into the hopper. I made it a bit longer than the pvc and it makes feeding better and it decreases dead space. It also works in rscb clips if anyone wants to try it. Well, that is all I have to say. This is my favorite mod and I hope you like it too. 

New page

$
0
0
This is just a little post to tell you that I have a new page up called Trades and Sales. I don't really have anything on there but I am just telling you for future reference. Go to the page for more details. I also want to say that I NEED A PANTHER! If anyone can get a panther for me, that would be great. I am willing to trade or pay for one. Payments will be through paypal and we can organize a trade ourselves.   Please comment below if you have an online store link to a panther, a panther for sale, or a panther for trade.

White Lithium grease

$
0
0
Hi guys, this one is going to be a quick post. I just wanted to tell you about white lithium grease. I got some today because I couldn't find any silicon grease, but let me tell you that this is way better. It makes  a blaster's plunger head move so fast and it actually makes a huge difference over silicone grease. White lithium grease is also completely safe to use in your blasters too. The last good part about it is that I got a 227G tube of it for $3. On some websites, a 10G tube of silicon grease is $2.50! Don't buy silicone grease, buy white lithium grease.

Snapbow 2

$
0
0

Hi guys, today I have another snapbow. I decided to make myself a snapbow because I am going to refurbish and sell my other one to someone. This time, I decided to try to build it a bit differently and the pictures show how it worked out.


This time, I added a different handle and attached it differently. I also used a dowel rod for the stock and a cpvc tee to pull back on. This blaster is not finished yet though. It needs many more coats of paint on the red and black on the tee and barrel. The barrel may be wrapped in electrical tape though and the wood handle will also be stained.


Overall, I really like this snapbow and everything new that I tried on it. Also, decided to post this as an unfinished project because I will not be able to work on nerf for a week or so. Please leave your thoughts in the comments.

CROSSBOW!!!!!!!!!!!!!!

$
0
0
Hi guys, I GOT A CROSSBOW!!!!!!!!!! I am so excited for what I am going to do to it too. I took a trip to Goodwill today and there were actually two crossbows in stock form!!! They were each $20 but who cares. I decided that I would smash one with a hammer for the heck of it and that was super fun. I still have one crossbow so that it why I did it.

Elite Alpha Trooper Review + Photos

$
0
0
Hi Guys, I managed to get my hands on a Nerf Nstrike Elite Alpha Trooper. They are selling them at Argos.uk for around $20 U.S. dollars which I think is 15 euros. Anyways, it is getting the ranges I expected which is around 65-75 feet depending on the dart. What I like about it is how smooth the prime is. When I opened it up it has internals that are very similar to the retaliator, just like Mylastdart said this thing has some modding potential.

Stamblast With Paint Job

$
0
0
Here it is, the Stamblast with a paint job. Some of you may not know that it is officially named the Stamblast, but that is what Aukman and I decided to name it.


This amazing paint job was actually done by Aukman (I have no painting skills). I think that it turned out very well and it completes the blaster. This is definitely one of my primaries.

Draw My Stryfe

$
0
0
I decided to make this because of the recent "Draw My Life" Youtube trend. It is called Draw My Stryfe and it is about how I got into Nerf. It was made as a parody and I just threw it together. It isn't meant to be perfect. Please, watch the video and behold my epic drawing and voiceover skills.
I hope you liked it. Please leave your opinions in the comments.

Pistol Splat and Raider Shotgun paint

$
0
0
Oh school... taking up my life. I'm not able to do many mods right now because of school but here are two that I have had around for a while. first up, is my Supa Splat (also known as a pistol splat). Before I talk about the mod, I want to talk about this model of blaster because it confused me. (Skip over this grey text if you already know about this). The basic shell and priming mechanism of this blaster are very popular among companies and the NIC. Many different companies have taken the shell and internals and made their own versions of it. There are many different colors and different things that it shoots. Companies have made it shoot chalk darts, paintballs, and darts. These different blasters also have varying spring strengths. My specific one is the second strongest spring. Even if you see one of these in a store and it is a different color, just buy it. These things are awesome!
Modifications:
- Shell minimization
- Useless internals removed
- Epoxied cpvc coupler.
Yeah, I didn't do many more mods to this just because I didn't have to. This blaster is amazing with only a cpvc coupler. I am using a barrel that is about 2 inches too long and it is still beating my Nitefinder! GET THIS BLASTER IF YOU SEE IT.


 Next up, is the painted raider shotgun grip. All that I did was paint the grip silver because, who want a yellow shotgun grip?


I hope you liked these mods! Tell me what you think about pistol splats in the comments!

Slug Darts

$
0
0
School is stil keeping me really busy, so here is yet another filler post. These are my 1.25" slug darts.


I only made about 100 because I wanted to make sure that I like them. I definitely do like these and I will be making the rest of my slugs exactly like this. Sorry about how dark the picture turned out but here is a close up. They use green felt tips from McMaster, #6 washers, and beige foam from best materials. I highly recommend using these three materials because they are very nice and fairly cheap. Using the felt pads from McMaster also lets you make slugs very quickly. Not only that but the beige foam doesn't melt even if you use a high temp glue gun.  The beige foam also has a push fit in cpvc and a great fit in petg.
Here is a picture comparing an old slug with a new one. For the old one I used Frost King; a foam which has terrible fit in everything and melts with high temp hot glue. I also used #8 washers and craft foam.  
My final word of advice is to spend some extra money on your darts and it will pay off.

The Frankenstein

$
0
0
Here is my latest project named The Frankenstein. I think you can figure out why it is named the Frankenstein if you look at the picture.

More info after the jump!
The Frankenstein is essentially an expanded hornet tank in a Furyfire shell. This was not meant to be a good looking or clean mod but more an experiment. My experiment was to see if I could expand a hornet tank without cutting open the tank itself. It was a success and  I will be expanding more hornet tanks this way.

The extra tank is the little pvc stub with end caps that you can see in the above picture. I can tell you that it works great with ranges of +100 feet! That is only with 2 pumps and a front loaded slug.
Features:
- Externally expanded hornet tank
- PVC bushing
- Trigger linked to blast button
- A lot of external tubing
- Bike pump
Now I know what you are thinking, "Why did he attach the pump with duct tape?". Well, I did that because I needed a temporary solution to hold it on until I get some zip-ties. 
Other than the pump, this is an incredibly fun blaster to play around with. With a smaller pump, this would be something that I would actually consider using. Even though it had barely enough volume to use a hopper, this is a really awesome blaster with really awesome ranges.

Restored Laser Fang

$
0
0
This was a fairly old project but I decided to bring it up now because I finally got my hands on some mega darts. This is my restored Laser Fang!


When I say restored, I mean the internals were broken and I had to fix them. It isn't restored to its stock form because I didn't get the wings for it and the electronics were completely broken. Other than that, this thing works great. I had to glue some stuff together and redo the seal but it wasn't hard at all. I got this in a $9 package on eBay which also included my BBBB tank used in my Stamblast and a ton of other things that I haven't used yet.


I really like the Laser Fang and in its stock firing form it works very well. I would say that it hits 30' with a mega dart. In its current state it isn't worth much but it sure is a fun blaster to have.
                                             

Hey, another boring update!

$
0
0
I know most people aren't going to read this and I completely understand why. I just feel the need to get this information out there. In the next 3-4 weeks, you guys probably wont be seeing any big projects coming from me. Don't hold me to it but that is probably what is going to happen. I have to study for finals, take finals, and do other end of school/beginning of summer stuff.  I bought these air techs recently so they are probably a possible project that might happen during the next few weeks.


Well, hopefully you didn't fall asleep from reading this post, just incase you did here is something to make up for it.

Mega Centurion Announced

$
0
0
Well, it looks like Nerf has finally announced the Mega Centurion. I got this picture on Facebook and I thought it would be cool to show that Nerf announced it.

AT2K Overhaul

$
0
0
Well, I guess I did get around to my AT2K overhaul. When I got this in the mail, the pump was acting weird so I opened it up. Let's just say, that is where fun started.

Click below for more info!
Before I get into my story of this blaster, here are the mods.
Mods:
- PETG barrel replaced
- Pump handle replaced
- Turret seal improved
- Rear loading
- Tubing replaced
- Air tank spring hot glued
- Increased airflow
- New pump stop method
- Plugged pump

Those are all pretty standard mods for an AT2K except they were harder than they are for most people. When opening a 2K, you have to get rid of a little nub that is over the nub that holds the pump on. People can usually place the blaster in boiling water, pry it, or saw it to get the nub off but none of those worked for me. Why? Because it was completely glued on. I had to saw the whole pump-holding-thingy off. 

I then decided I wanted to mod my 2K. I then started on the turret and use boiling water to remove the stock barrels. IT DIDN'T WORK! Most modders say that you dip it for 20 seconds in the boiling water and they should come off. It that doesn't work, put the turret in for longer and then use a knife to remove the glue. Too bad after putting the turret in the water for 2 minutes NOTHING HAPPENED. I then used a knife but the barrels were all glued together and they were almost welded into the barrel ports(I guess if that is the correct term). I eventually spent a lot of time dremeling the crap out of the turret and shoved some PETG in it. I finished the mod but it made it considerably difficult.

Now I know most of you didn't read the above paragraph because it is too long and you don't care. To summarize, everything on my 2K was glued together and I had to get the things apart. I realized I didn't have a barrel spacer for my barrels so I had to improvise. I found a dowel rod that could space the barrels apart and taped the PETG to it. It works, not as well as a barrel spacer, but it works.
The last thing I did was the pump handle. I wanted to do something creative with it. I decided to make it a dart holder. The pvc easily twists off and can hold 3 extra darts which is pretty cool.  The only bad part is I have a huge pump handle on my 2k.
This 2k mod actually turned out pretty well and at 5 pumps it is hitting 90+. You can also see my pump stop in the above picture. I drilled small holes and put two nerf screws into the pump shaft. It works pretty well.

Update: Unless I do a quick project over the weekend, there won't be anything new from me for 2-3 weeks. I might get Aukman to actually post something but that is doubtful. Keep checking this blog but just know that there probably won't be much on it.

Let me know what you think in the comments! Also, has anyone else had trouble with their AT2K being glued together all over?


PETG Breech Tutorial

$
0
0
PVC and CPVC breeches can be hard to make because of sanding, the seal, and just making it work. They take a long time to make because of that sanding too. Here is a tutorial for a simple breech using PETG and PVC. My breech was rushed because I didn't have much time to make it but yours can be much nicer than mine.

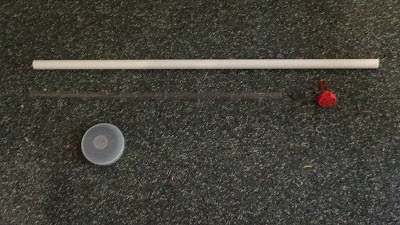
Here are the things you will need to make it:


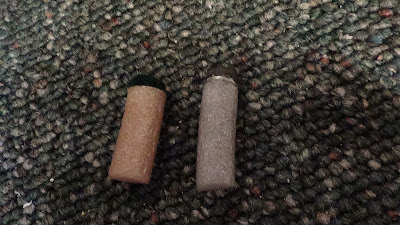
These materials consist of electrical tape, PVC, PETG, an AT2K Goo Gauge, and you will need some type of adhesive. Hot glue or goop will work fine. Instead of the Goo Gauge you could use a wide straw, thinner PETG, brass, or any kind of tube that has a very loose fit in PVC.
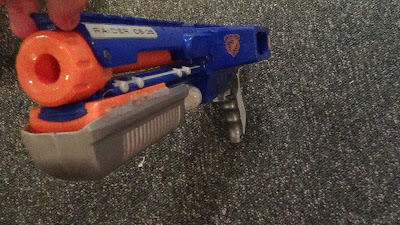
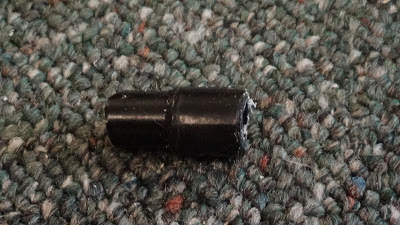
Here is the part of the goo gauge that I cut off. This is the part that you will need.


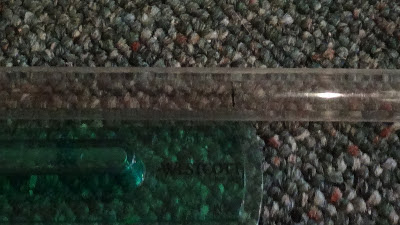
I am making a 12" breech but you can make yours any size that you want. You will just have to change the proportions of yours. Here I measured 12" of PETG and drew a line to cut it.


Next, place your goo gauge tube halfway into the PETG. Line up your PETG with the PVC and cut it to the length of where the goo gauge tube is sticking out.


After cutting the PVC, measure about 2.5" and cut it there.


Now wrap the PETG with electrical tape so that it will line up with the small section of PETG. Push the PETG with the tape into the PVC section and make sure it has a very snug fit.


You can then glue the PVC over the PETG with hot glue or goop. The next step is to wrap some electrical tape around half of the goo gauge tube. Test fit this in the PETG and make sure it has a snug fit but it can still be easily pulled out. This step is actually very important because it will determine the seal of you breech. Remember, make it snug but also so you can pull it out.


The Goo Gauge tube with electrical tape is pushed into the PETG in this picture.


Now you will wrap the other half of the goo gauge tube with more electrical tape. You don't want this tape to interfere with your previous taping job. Keep wrapping the tape until this end has a very snug fit in the PVC.


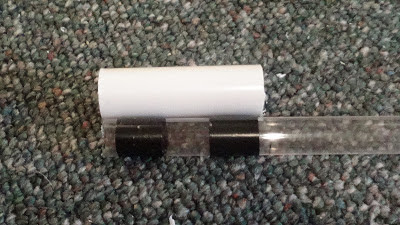
Shove and glue the above piece into the PVC so that the end with the smaller diameter goes in first. DO NOT PUT GLUE ON THE SMALLER END!


There it is glued in.


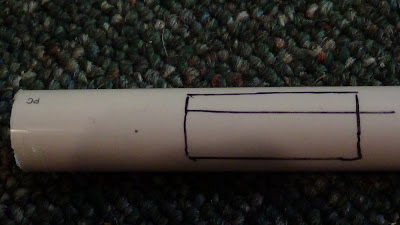
Draw the lines for the slot in the PVC. Make sure it is large enough to fit your darts. I messed up on my slot drawing so that is why there is an extra line.


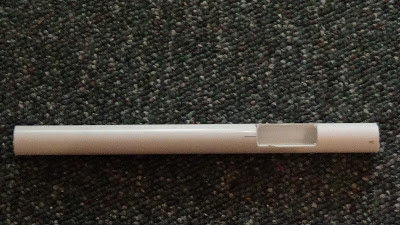
Cut the slot with your Dremel or saw (I don't suggest a saw) and sand it down (unlike me). It should look like this:


Now all you have to do is put the first piece of the breech (the one with the PETG) into that piece and your breech is complete!


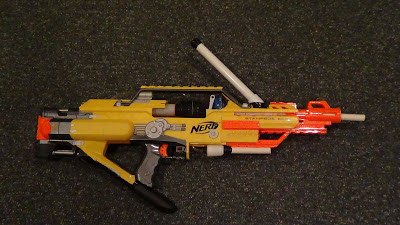
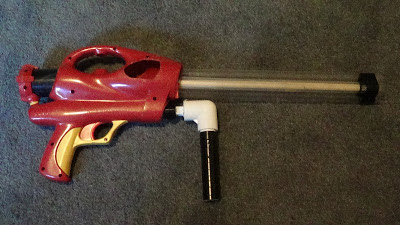
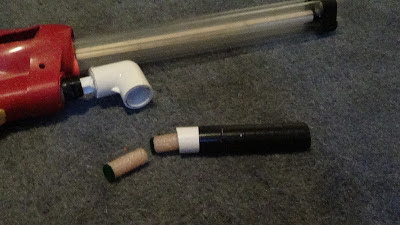
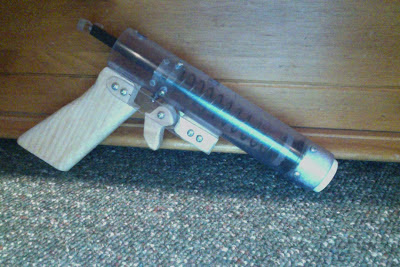
There's my finished product. The two PVC parts don't have to touch each other but it will look nicer if they do (mine don't touch because I didn't glue the PETG in far enough). You could make a breech tab and notch like Popatchi did 
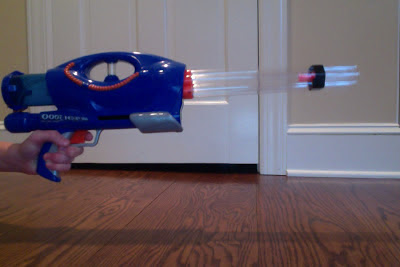
here but it isn't necessary unless your barrel shoots out. This PETG breech is ideal for air blasters but it still works very well in springers.


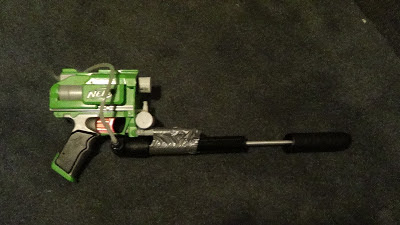
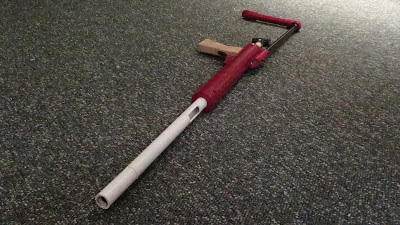
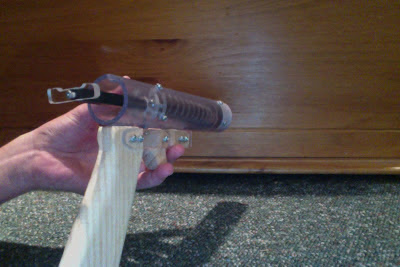
The breech in my Snapbow.


I hope you like this breech and decide to make one! 

This is my last post for two weeks.


The Mega Centurion

$
0
0
Let's start off with the good news. I'm back and I have some awesome things planned. On to the bad news: The Mega Centurion internals were posted by Langley and I am very disappointed. It ends up that the hype around this blaster (for the modders) probably wasn't worth it because of the fact that it has a reverse plunger. Yay!(sarcasm) I thought the elite line got rid of reverse plungers but apparently not.


There's a picture of it compared to the Longshot plunger tube taken by Langley. This was supposed to be the elite Longshot with a huge plunger tube. It turns out that it is more like a bigger Longstike with a plunger tube that has holes in it.


This Centurion even looks awesome like the Longstrike. Now, I am not going to completely bash this blaster. It is an awesome blaster for stock fans of Nerf and they will finally get their "sniper rifle". There is no denying that this is a really cool thing. I might buy it because it shoots the farthest of any stock Nerf blaster but it IS really expensive and modding the PT would be extremely difficult.

I actually have a weird theory that the prototype Centurions might have had direct plungers and non-hole-filled plunger tubes but they were too dangerous for little kids to use. Anyways, this will not compete with homemades (unless sealing the PT holes makes it) but it will be a cool blaster for stock fans.= who don't know about internals.

What do you think of the Centurion? Will you buy it?


Crossbow!

$
0
0
Here it is, what you have been waiting for your whole life. This is not April Fools (it isn't April incase you didn't know) this is legit. Just click read more and your life will change forever.

Yeah, it's a crossbow alright (with an extra arm and some other crap).


This is what happens when Aukman and I are bored. We build the best thing ever. I know you are wondering, no we will not make a write up. This requires too much skill and craftsmanship that it can never be replicated.


I know, it is the most beautiful thing that you have ever seen. You wish you had this crossbow for yourself. TOO BAD IT ISN'T FOR SALE.


This amazing piece of art consists of parts from the following blasters: UMB, Longshot, FuryFire, Double Shot, Big Bad Bow, Recon and a Secret Strike. Does it shoot? Of course it shoots. Why would we ever make a blaster that doesn't shoot? It shoots any kind of ammo that you can find. You just have to load it into the secret strike barrel and pump it.


I do admit, the pump isn't in the best place but that is the only flaw of this blaster. It is the best thing ever! Tell me what you think!


Rainbow Pistol

$
0
0
I have finally made a Rainbow Pistol! I have been wanting to make one of these for a while but I just haven't had the tools to make it. I got enough money to buy a scroll saw and polycarbonate so this was the first thing that I tried out. I am very happy that I got some practice on the scroll saw before I make more of these and a +bow because my first cuts with the saw were very very bad. Now onto the pistol.

I am very happy with how this turned out because I expected it to be ugly like my fist Snapbow. It isn't ugly at all. There are some imperfections but I can work all of those out in the next couple pistols I build.


It has most of the same features that NOM's RBpistols have. It has a K25, a skirt seal, a rainbow catch, and a very nice handle. The only changes that were made were that I changed out the nylon spacer pulls to a polycarbonate pull. The only reason for that was because I forgot to buy the spacers but it actually turned out very well.


There isn't really much to say because RBpistols are pretty self explanatory but I really like it. All that is left to do it stain the handle and sand the edges of the polycarbonate. I have to give a huge thanks to ModMan712 because he made the catch, gave me the measurements, and answered all of my stupid questions about it. I do plan on making rainbow catches myself but I just wanted one for reference and I don't have hole saws yet. You stay classy, San Diego.
Viewing all 96 articles
Browse latest View live